Sunday, January 18, 2015

Week 2: I'm beaming - at the removal of beams

Week two was all about opening up the space and preparing for the stairs. A major beam that was in the soffit in apartment three was removed and framing was put up to support the floor while the hole is cut for the stairs. We will need a special inspection for this before the hole cutting can proceed.  I am not sure if that inspection has happened yet, I will find out next week!


Welcome! Watch out for that new big piece of wood.

The reinforcement went up this week to help support the floor while they cut the hole for the stairs.


That second set of framing on the left is to help carry some of the load when they removed the bream.


Before and after!  


Where the beam used to go in to the wall:


Week 2 - We can see the light! (through the vents in the roof)

Structural work will be most of what we see for the next few weeks. Not as dramatic and visual as the demo week, but these project make me feel like real work is being done. We are also getting a chance to see how the space will open up. I was nervous going in to this week as you never know what you will find behind walls. The structural engineer and architect took a look and said there are no major surprises but some smaller head scratchers (as in, why the heck did the prior homeowners do that?). This will result in a change order, so keep your fingers crossed that it isn't too much!

 ******************************

That grey area on the left is the sheetrock for the ceiling below (the apartment where we are currently living. There a now a few holes in the ceiling which they will fix once the structural work is done (I'll show that another time). 

This is looking up into apartment 4. They have removed all of the floors and set plywood down.

This is looking into the old kitchen in apartment three. The white stuff is from various drips overtime from what was out old kitchen. There is a reason there was a hole in the floor when we moved in.


Hmmm, no idea why the sub-floor is bad here, but my theory is the flippers who renovated this house in 1970 just didn't fix it and put flooring over it. 


This is above our old kitchen on the 4th floor. I think this used to be a walk-up stairway to the roof. We currently have a permanent metal ladder to the roof hatch


More old gas pipes in the ceiling for gas lighting. I am hoping the team can remove these since they haven't been connected to a gas line in 40+ years. 

This is the 4th floor living room. I am not sure why they only covered with plywood in the center of the room. I think it is so they can look at where they will be cutting the floor for the stairs. 


 Hello roof, from the third floor.

The beam that will soon be gone.


Looking up from the thrid floor. This is where the stairway will be.

They have removed the bathtub and floor from the 3rd floor bath.
 Roof vent. And what our architect called a "ratty" system to keep the ceiling attached to the rafters. They will redo this.

The master bedroom where they will put the new AC system in. 

Protecting the brick in the hallways. 


Week one (part two)

The rest of the first week was mostly demo. When I went upstairs the next day all of the trash was gone. Amazing! They carted it away in a dump truck which made several trips to the house over the course of the day. They carted the trash down in heavy duty garbage cans and dumped it in the truck.


 One surprise that I could see, once all the demo trash was gone, was this pipe in the ceiling of the 3rd floor which will be the dining area. I think it is an old gas line that once fed a gas light fixture. I hoping they can pull out all of the old pipes. They are no lover connected to the gas line which was capped 40+ years ago.
 Someone wanted to be in a picture....note the privacy cardboard on the right. The crew is keeping this bathroom functioning as much as possible during the reno.

Sunday, January 11, 2015

Finally!

Most people think this at the end of their renovations, I am just glad to finally be starting! We began this renovation process in January of 2013, with our initial meeting with our architect. I already had a wish list broken down room by room in the house.  I had spent time on Houzz looking at rooms and getting an idea of what I wanted to include. After drawings and meetings and the permit process started (including Landmarks) I thought we were going to start in March of 2013, then July, then September, then December - when a slight discrepancy in addresses on our contractor's paperwork made the DOB decide to have him get re-licensed, after 14 years of benign a licensed contractor in NYC.

SO

We FINALLY started demo on January 5th, 2015. On Tuesday I decided to get some quick photo before heading to work and I am glad I did. Because what looked like this in the morning:
 This will be the main door we enter after the renovation.
 There will be a stairway connecting the apartments on the left.
 This will be French doors leading to the deck.
 Dining area
 Kitchen will be expanded to an L shape with an small island

 Mmmm floral wallpaper. Yummy. Sorry, we will not keep that.

 I couldn't resist a year ago and started taking down the wallpaper. So yes, it looked like that for a year, but we weren't living there.
 This will be Gothamgirl's /guest bathroom. Please note the molding on the ceiling....again, not my old apartment.
 More wall paper in the bathroom
 The yellow room will be the guest room and "homework room". The purple will be Gothamgirl's new bedroom.
 This is our old apartment.


 What you see when you enter the door. This will be the living room after the reno. Before it was living room, dining room, home office, craft space.
 The living room, west wall.
 South wall
 North side, looking into our kitchen and hallway to bathroom and two bedrooms.
 Kitchen, will be the boys' bathroom in new configuration.

 Our pink bathroom, which will be just my bathroom.


 Master bedroom
 Kids bedroom, will now be Gothamboy's room.
 Hallway looking back toward the living room and kitchen.


And that evening?


 Bye bye kitchen, but not ALL of the floral wallpaper. You can now see into the bathroom!


 I thought I had pictures of the bathroom, but apparently I only got the ceiling. That brick was the tile wall of the shower.
 Looking back towards the living room (what will be kitchen and dining room).


 This is upstairs on the 4th floor. All of that stuff is the cellulose insulation.

 No more ceiling! You are seeing the underside of the roof.
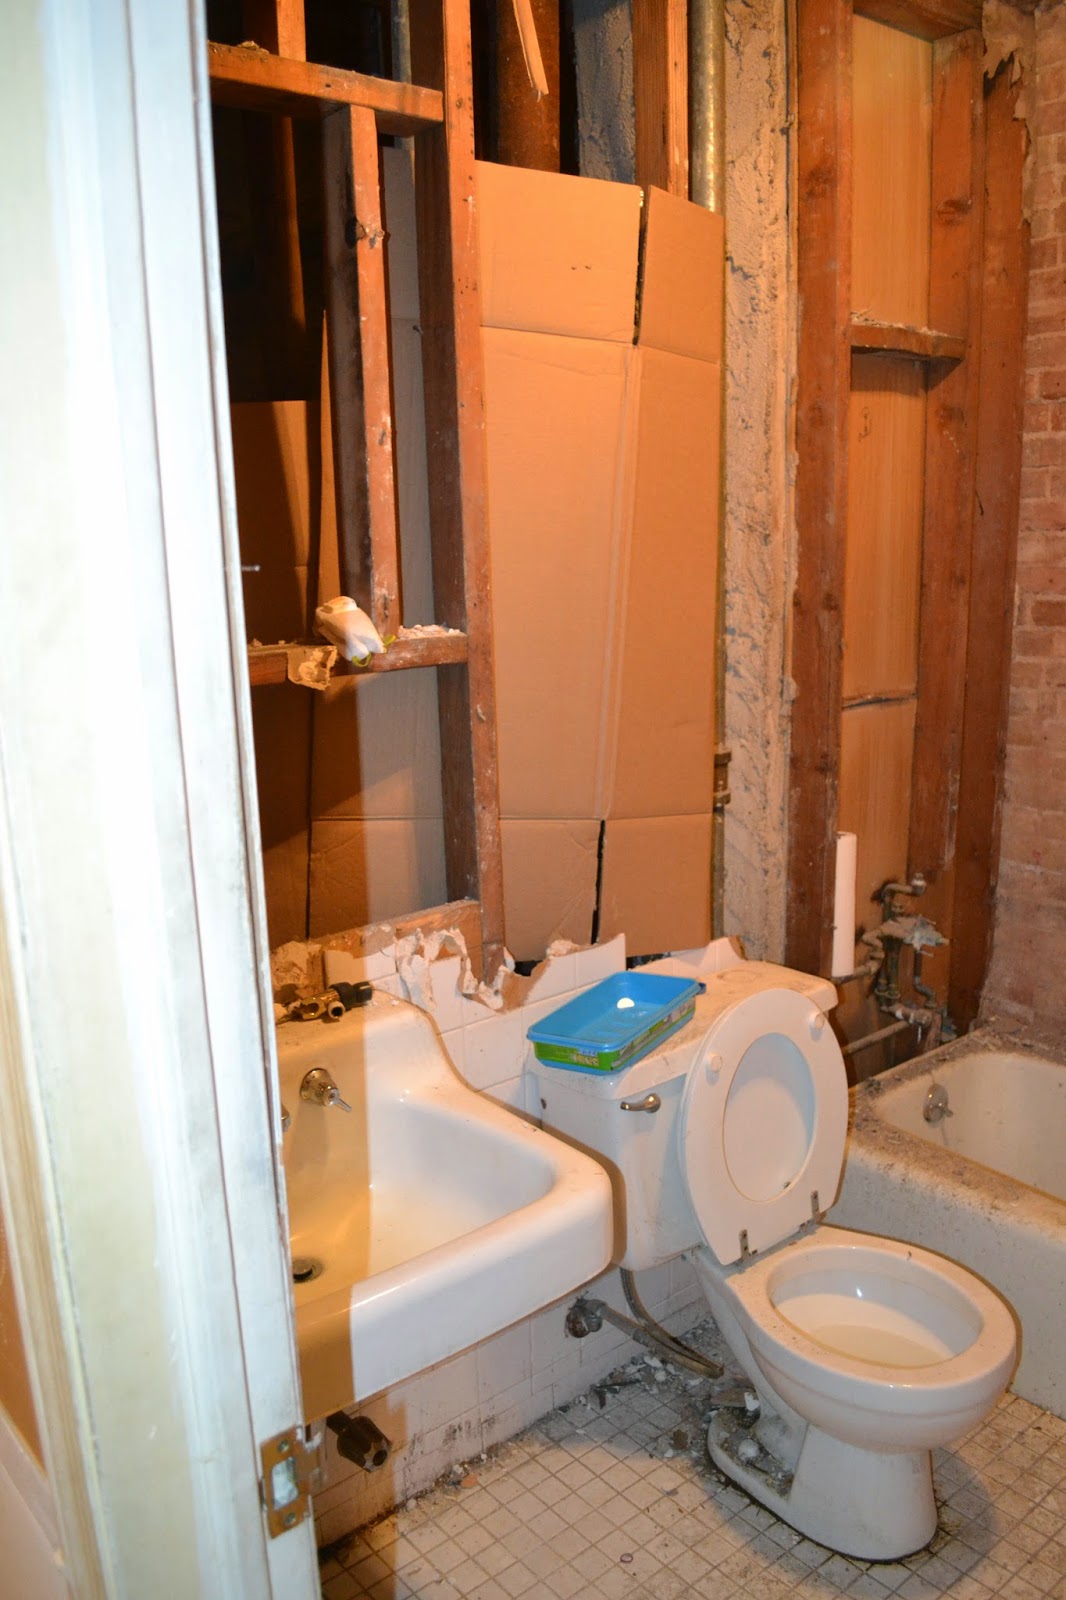
 This was our kitchen, it will be a bathroom.
 Our former pink bathroom.
 Bathtub, where I washed the kids. Sniff Sniff.
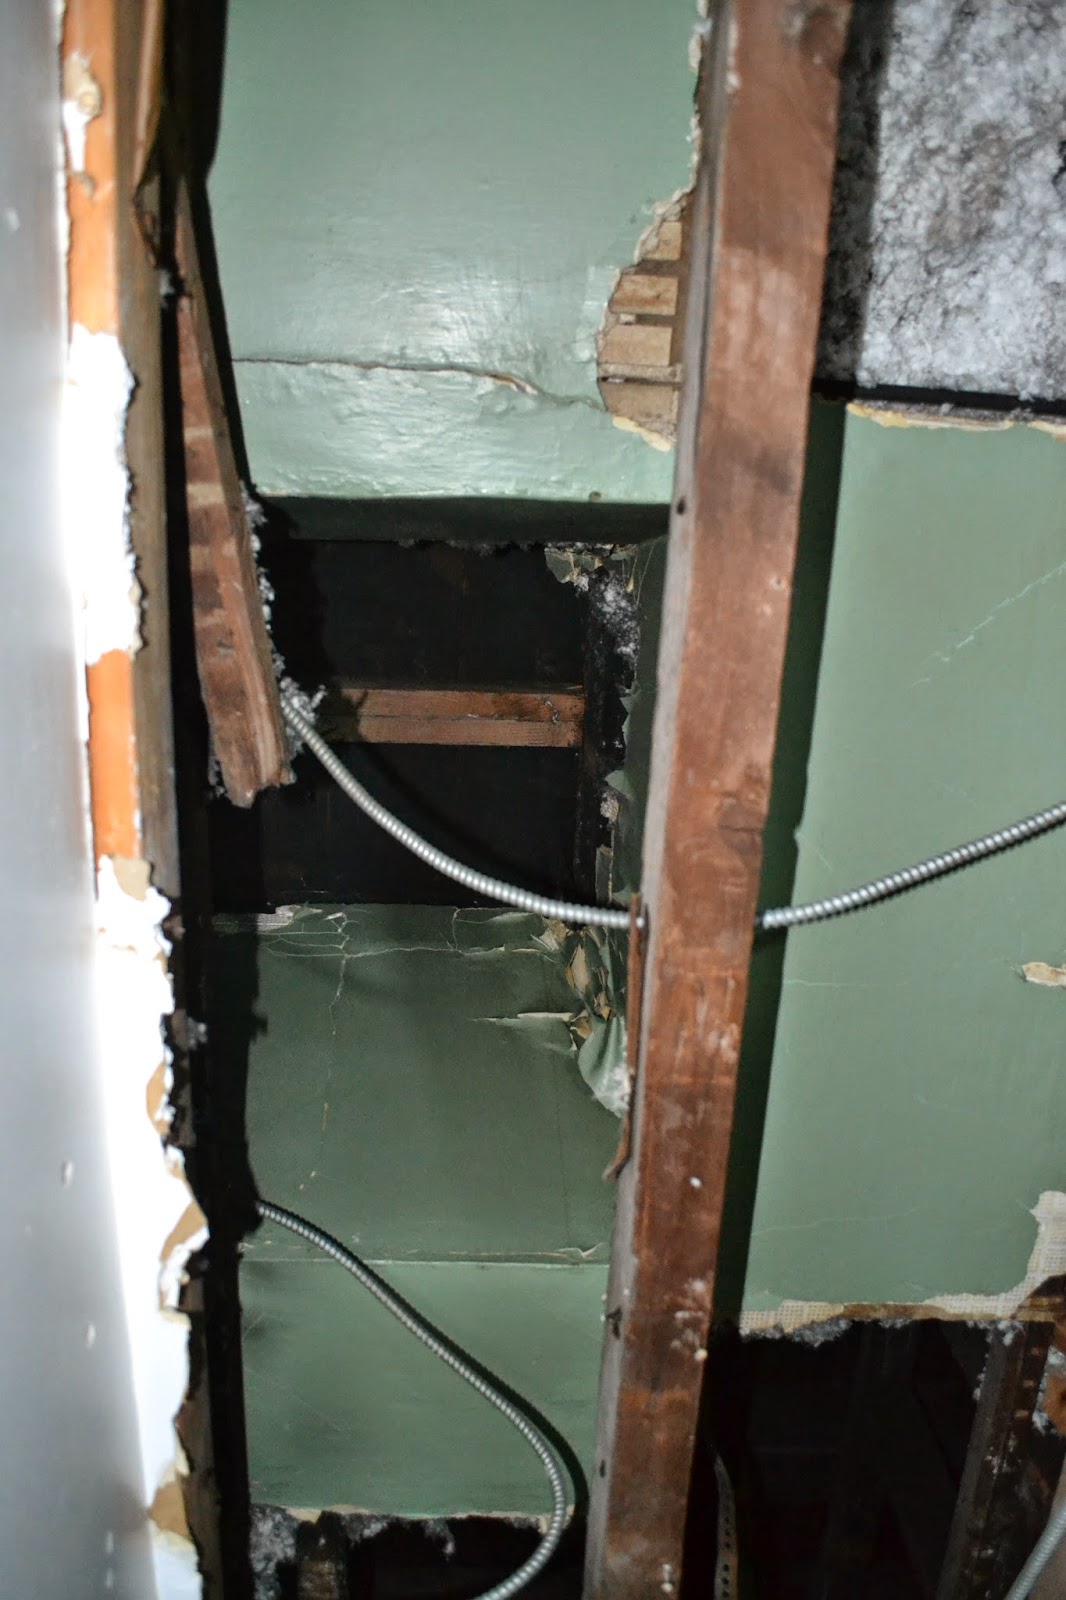
 At some point there was a skylight where our bathroom was. They roofed right over it.
This is an old light fixture they left connected, draped over a rafter and then sheet rocked over. Thanks 70's flippers! The flippers did not put the insulation in, that was my parents. There was no insulation in the house.